
Alternatives to Panopto
including DIY video, and recording with Powerpoint
If you have already made your recording and just want to know how/where to upload it, you can jump to the Putting it online section
DIY video - with camera, laptop or phone
"In terms of what it feels like, there’s no question it is weird having no feedback, but I guess you just have to think of yourself as recording a podcast rather than a lecture…"
another way to show your slides
Nearly all modern ‘still’ cameras, from palm-sized compacts to proper DSLRs have an option to shoot high-quality video, and of course you might own a proper video camera. It is also possible to get perfectly acceptable results using many phone cameras. What you lose by adopting this approach is the simultaneous capture of the (timestamped) slides alongside your piece to camera.
While there are a number of formats that your device might offer, MP4 is preferred as it is of sufficiently high quality, and can produce relatively compact files. Quicktime is ok if you don't seem to have any alternative, but please don't use 'pro' formats such as AVCHD and XAVC, as the file-sizes make them wholly impractical in this setting (and they would need to be converted in any case).
If you want to do it this way, then just be sure to:
- keep the device steady while filming – probably by propping it up on something,
- try to use it at about eye-level, and held as near to vertical as possible (not pointing upwards at an angle from a table-top)
- don’t have it too close, as that will tend to make a face look slightly puffy, but
- …not so far away that the sound is echo-ey, or not clear. (The audio is more important to your audience than the image [unless you are displaying a detailed graphic].)
- Choose a well-lit place to sit/stand, preferably not with just a strong single light source above (or behind).
- Think about your background, and try to avoid filming in front of anything too busy. Technically - if not necessarily aesthetically - a plain wall is probably preferable to, say, a colourful garden.
- You don't have to shoot it all in one go - use the pause button.
[jump to putting it online]
Powerpoint - record a slide show
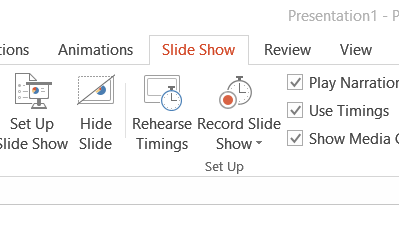 If all you want to record is a voice-over on top of a slide presentation, then Powerpoint has a built-in recorder tool, which can capture your presentation as you go, including all the slide changes, and indeed anything else you might have incorporated (e.g. video clips).
"recording as you speak to the slides is probably the best approach. I think I’d do it on my computer, looking at the slides and recording audio as though I was lecturing."
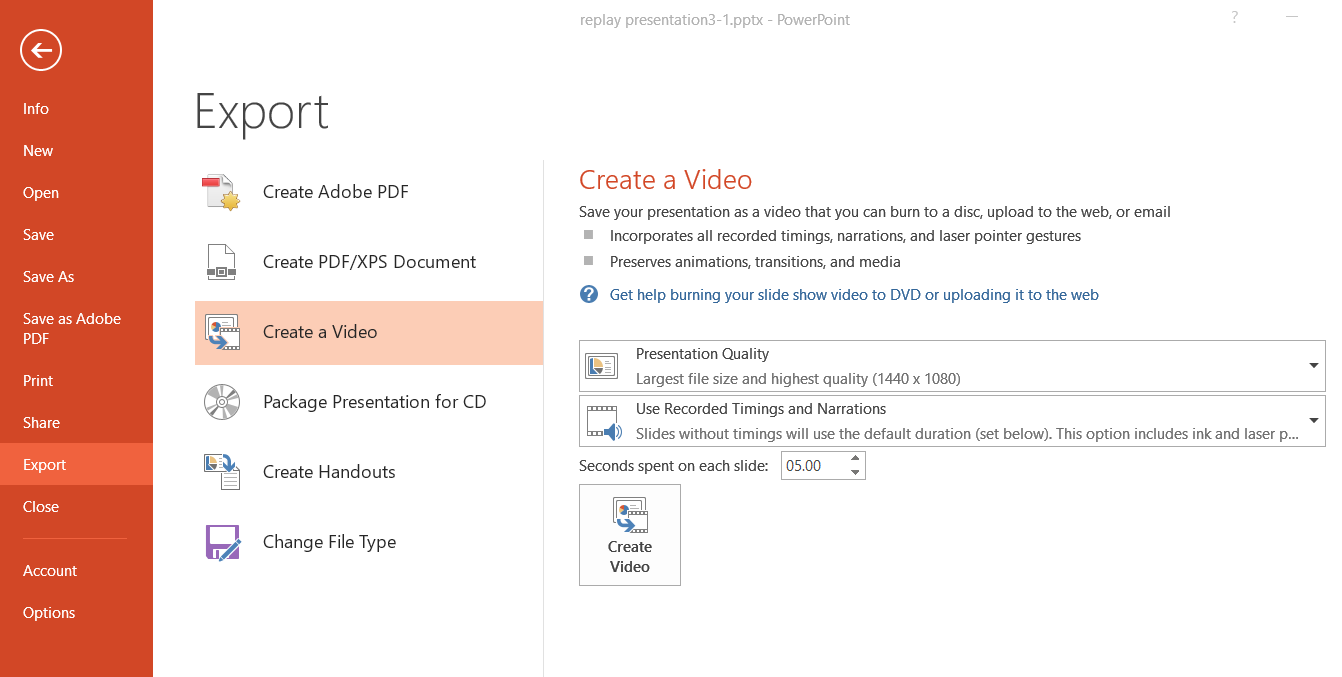
When you have finished, do File | Export | Create a Video to create an .mp4 video file which can then be uploaded.
Putting it online
|
Please do not email video files, as they will always be so big that they cause significant congestion in the mail system (if they get through at all). |
Once the recording is finished, you will need to upload the recording to a place where your audience can find it. It’s best to actually put the recording into Panopto’s filestore via Canvas so that the access to it is handled by the Canvas permissions. There’s a help page called Recording and sharing Microsoft Teams meetings on the Centre for Teaching and Learning site. (You can probably skip straight to the section headed ‘Viewing, editing and downloading your recording’.)
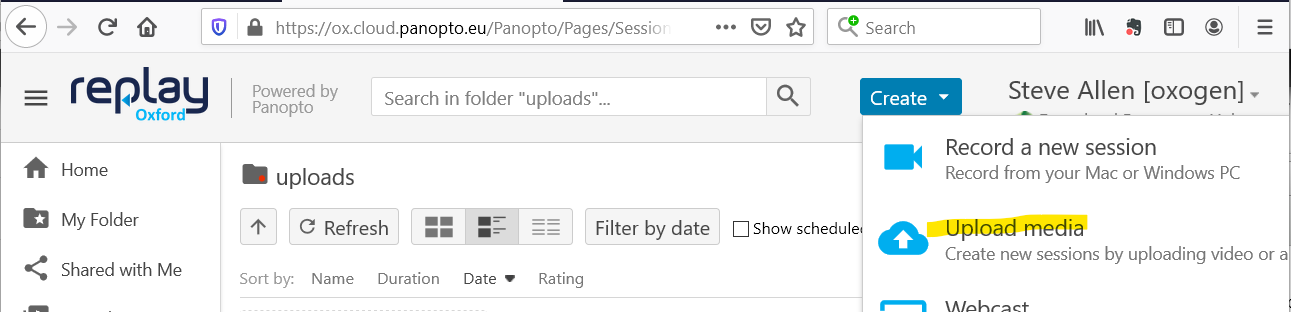
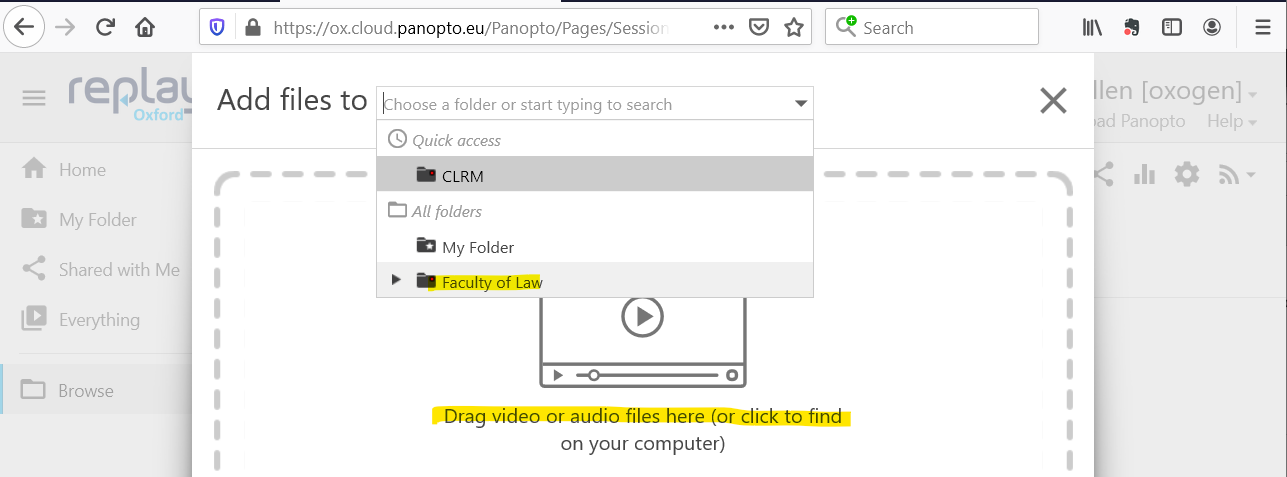
Alternatively, you can log in into Canvas, navigate to the home page for the course in question, then click 'Panopto Recordings'. Or you can jump straight in to Panopto:
Log in to Panopto to upload a recording
In either case, create a new Panopto session by uploading your recording:
If you aren't already in the relevant Canvas-related folder, you should be able to navigate to it.
If for some reason the course folder is not apparent, or if your recording is not related to a specific course, use Faculty of Law | uploads [*] and email Marina Amiconi to get the file(s) moved to the appropriate course folder.
If you have difficulty uploading your work to the correct location, Faculty staff will be happy to do the final part of the process for you (email Marina Amiconi or Steve Allen)
If the Panopto route does not work for you, try Microsoft's OneDrive to which all staff have access through office.com. The University's own large-file transfer utility, Oxfile, is also still available.
* If the uploads folder isn't visible in your folder tree:
- (If you’re in WebLearn, please log out of it and close your browser)
- Use this direct link to get to the uploads folder in Panopto via WebLearn.
-
Next, click on to My Folder, and go back to the start of these instructions.
